To renew or activate the SSL Certificate provided by NixNetworks for the first time on your Microsoft IIS web server, you will need to import it and then configure it on the server. Below are the necessary steps to do so.
Import the SSL Certificate
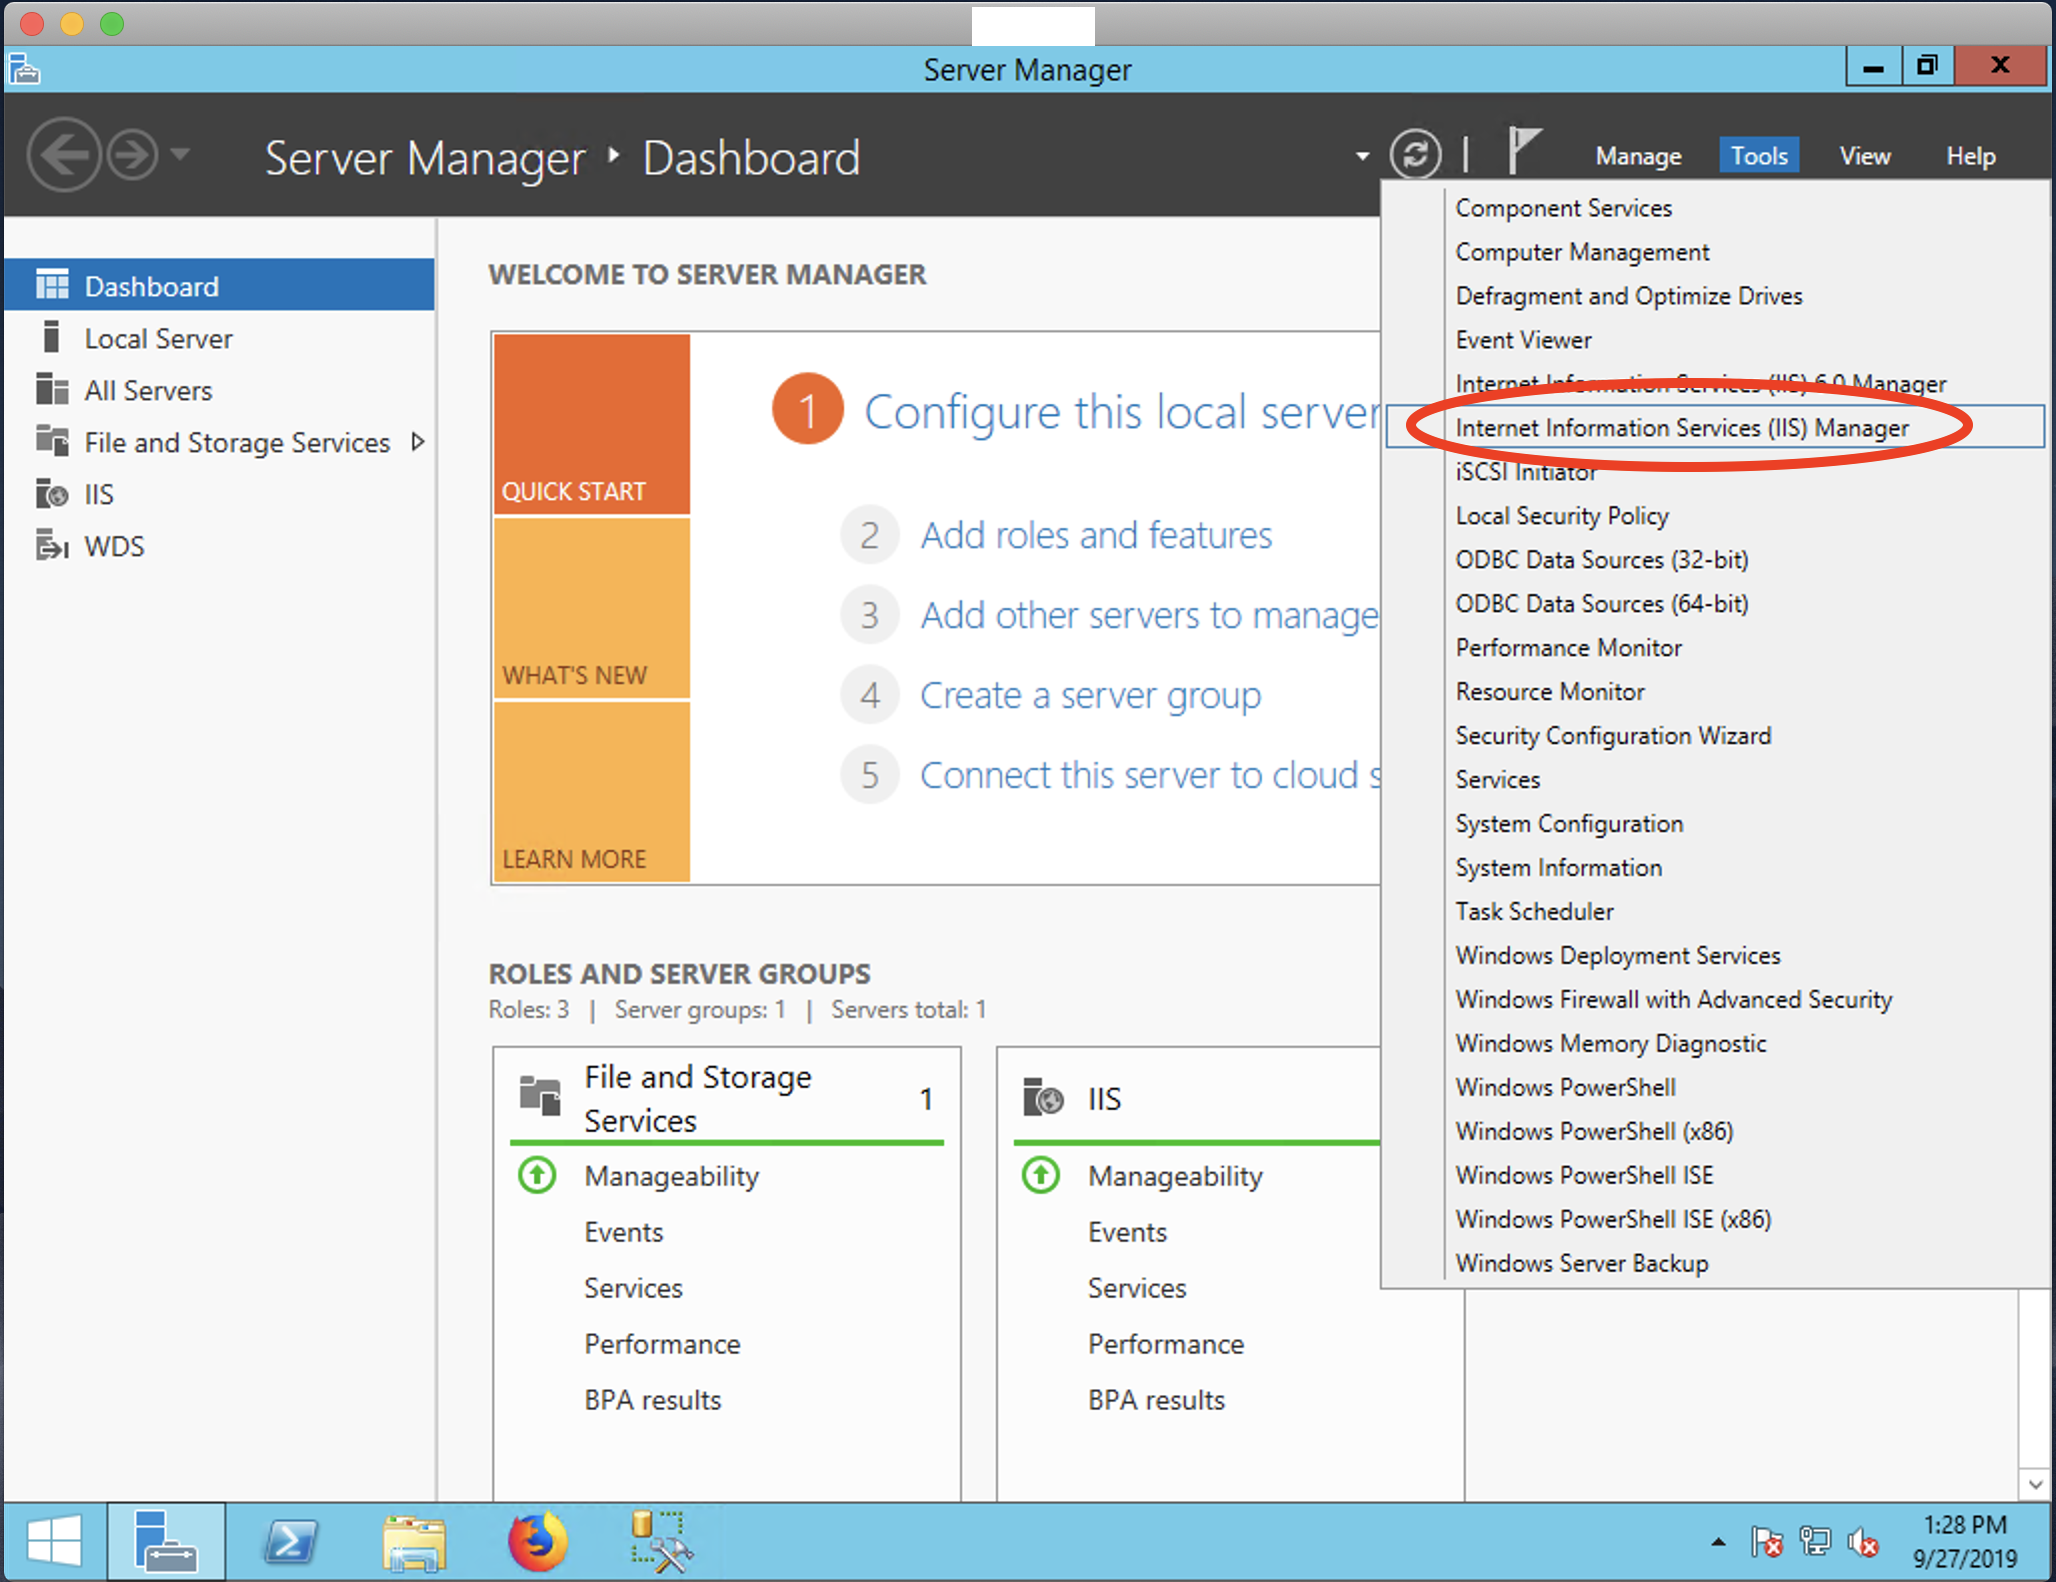
Step 1
Open the administration console: **Internet Information Services (IIS) Manager**
Step 2
Select the appropriate server and double-click **Server Certificates**

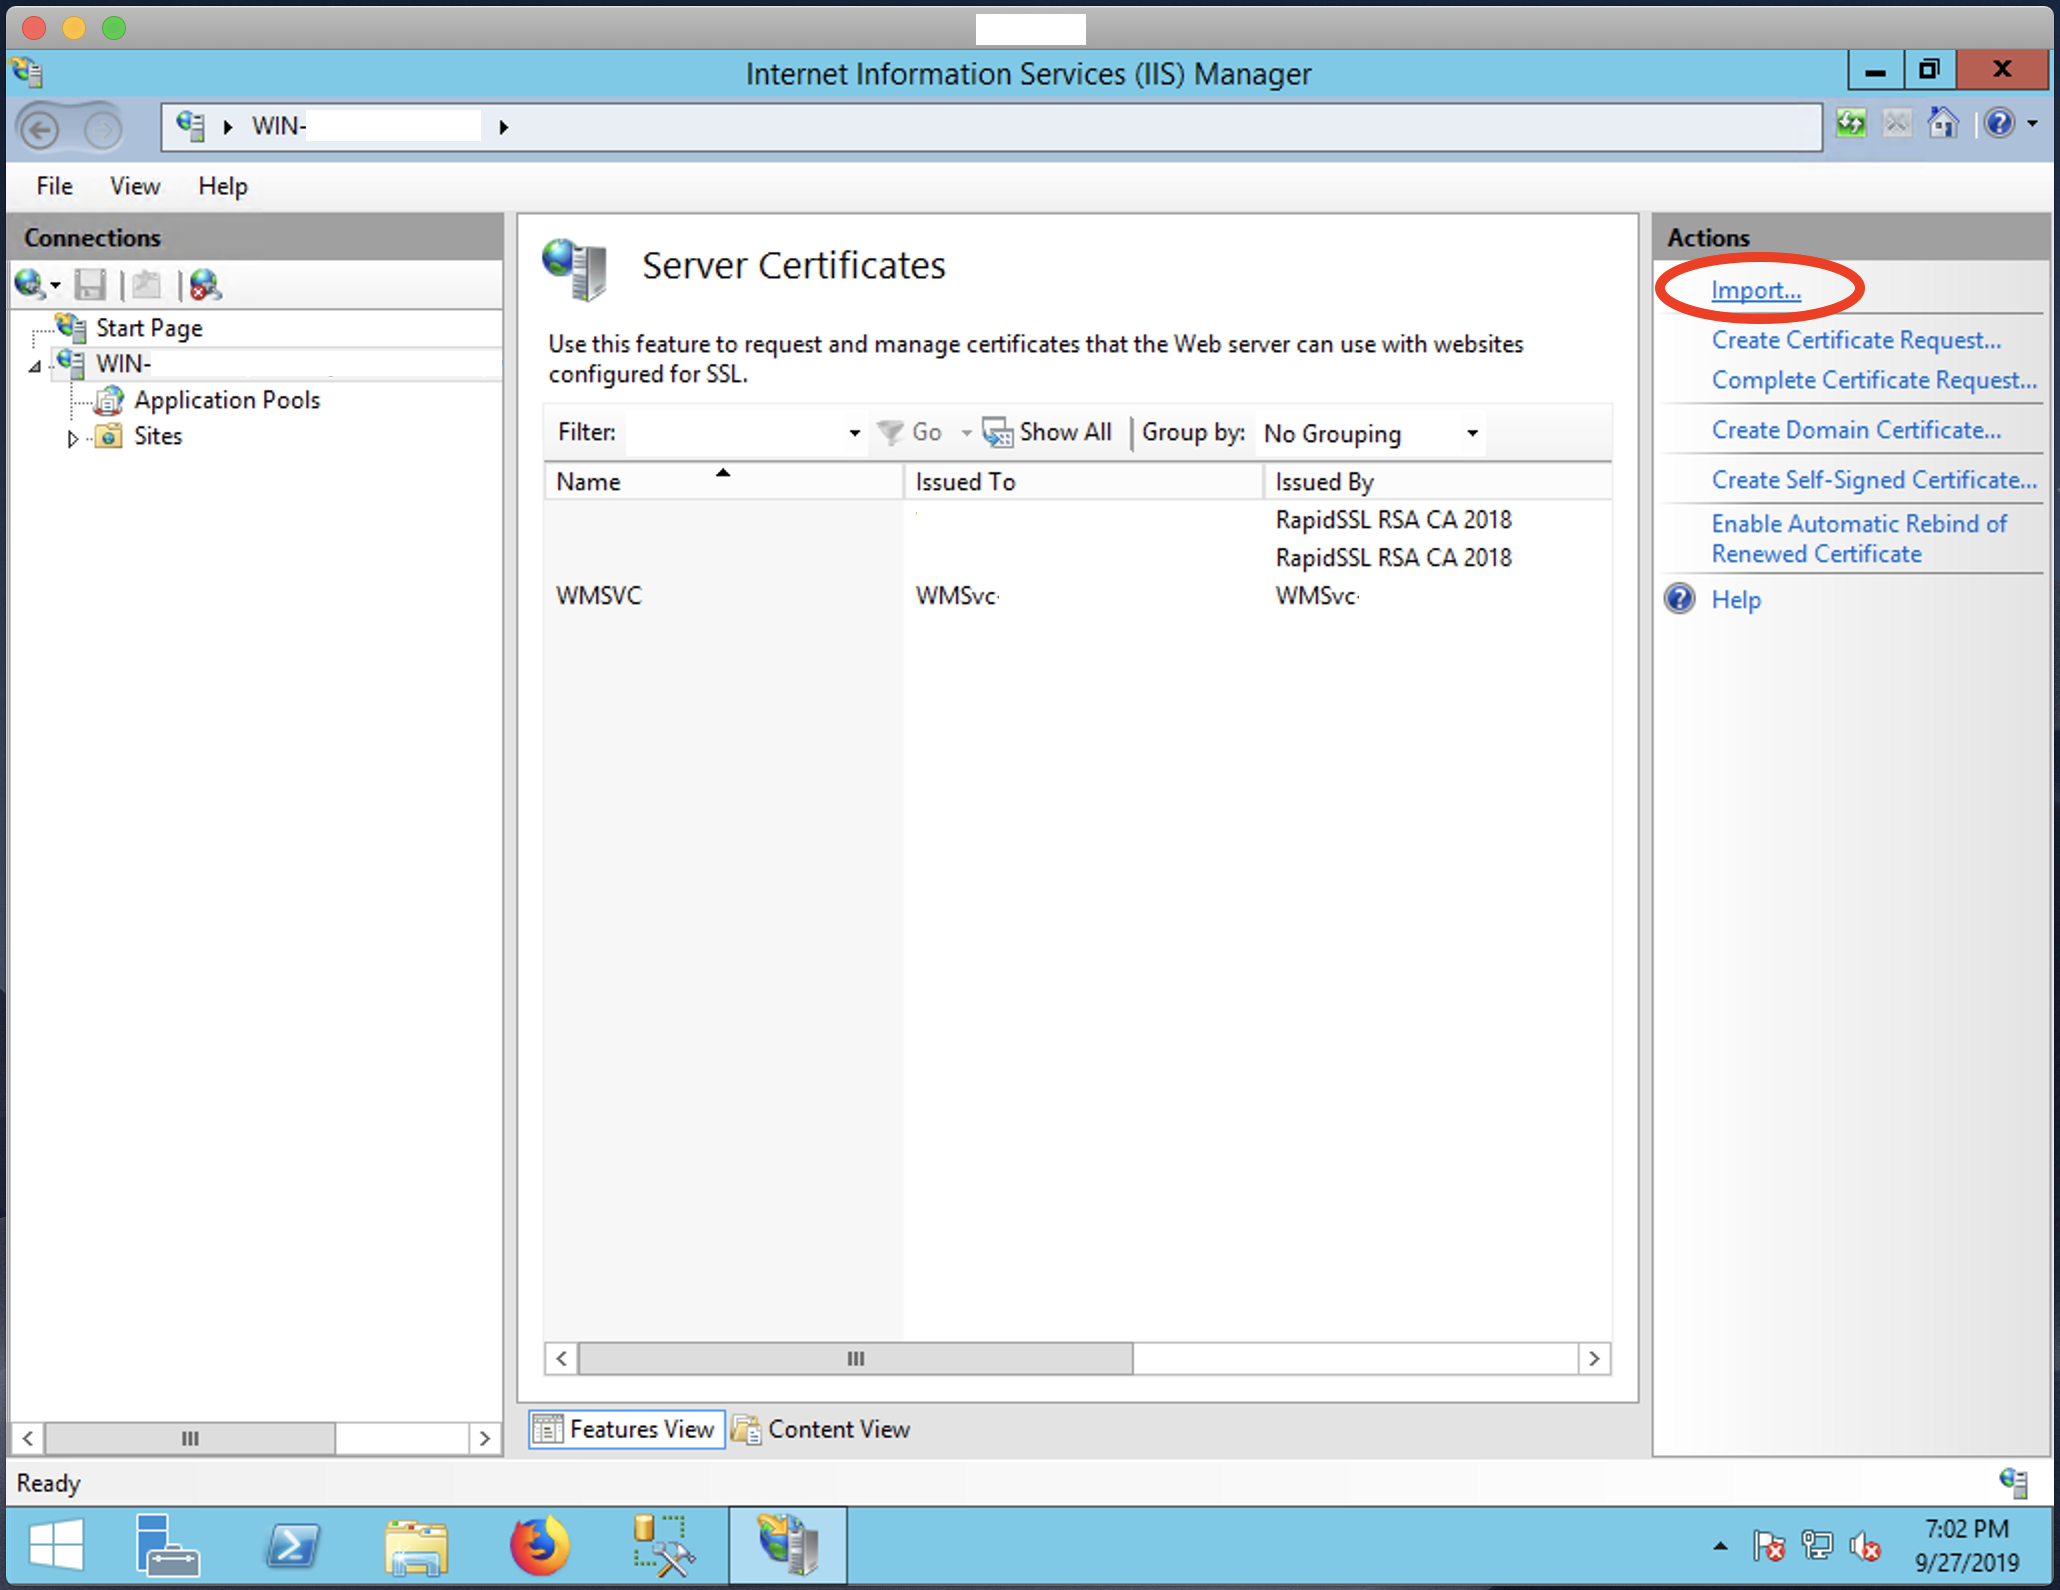
Step 3
In the list of certificates, select the **Import** option
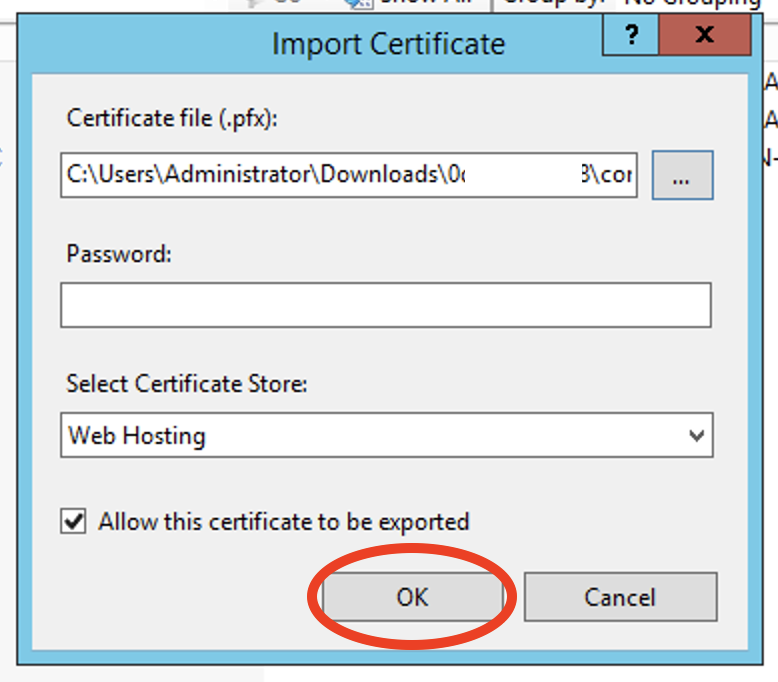
Step 4
Browse for the SSL certificate and click **OK**. The certificate must be in **PFX** format.
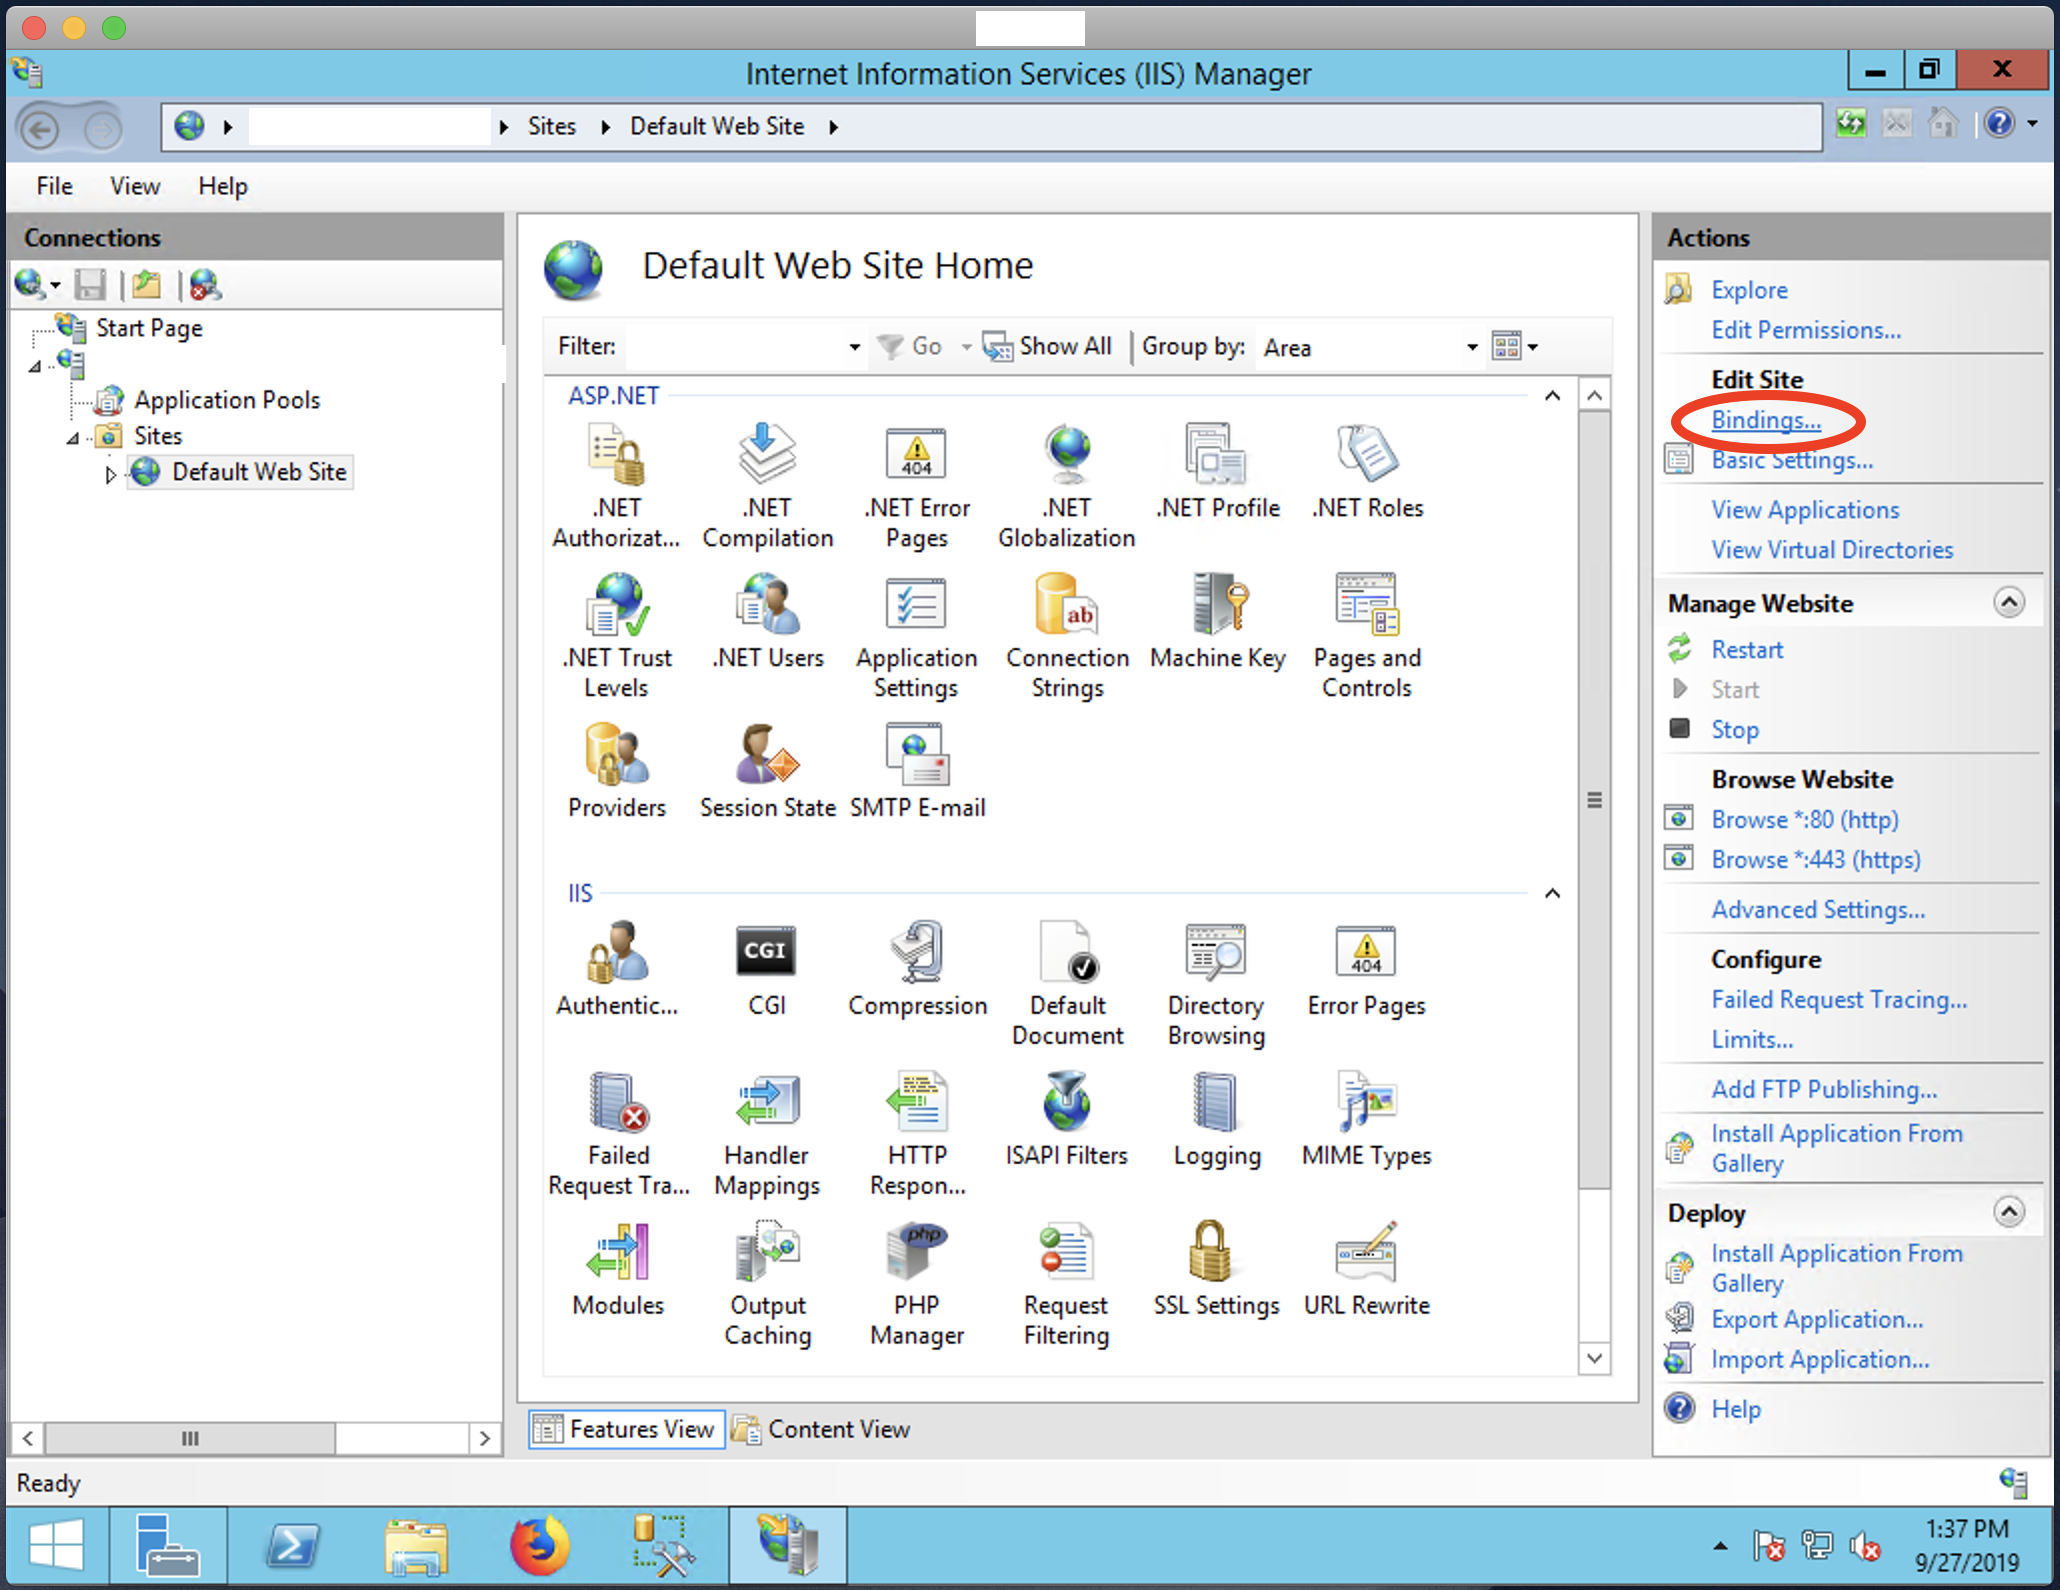
Configure the Web Server
Step 5
Expand **Sites**, select the site where the certificate will be activated, and click **Bindings**
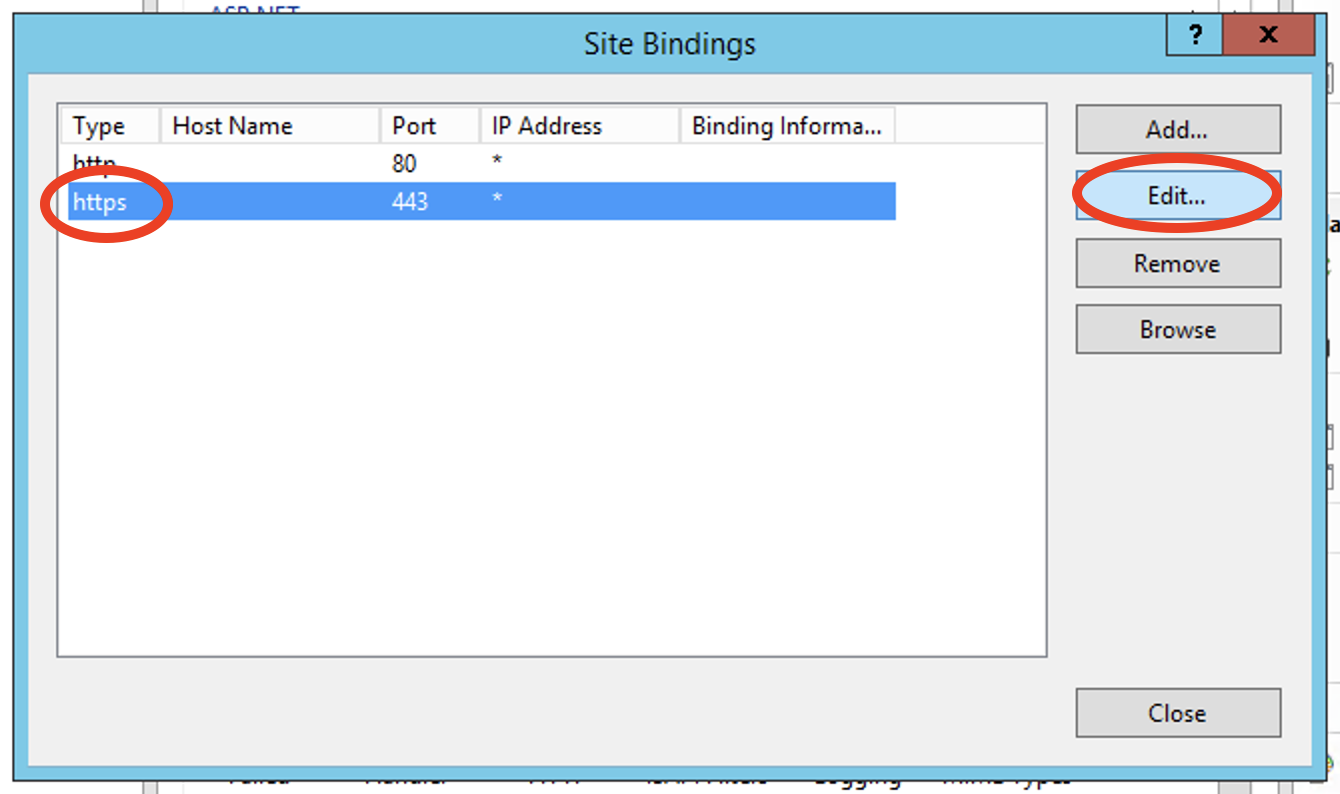
Step 6
Choose the **HTTPS** protocol and click **Edit**. If it does not exist, click **Add**
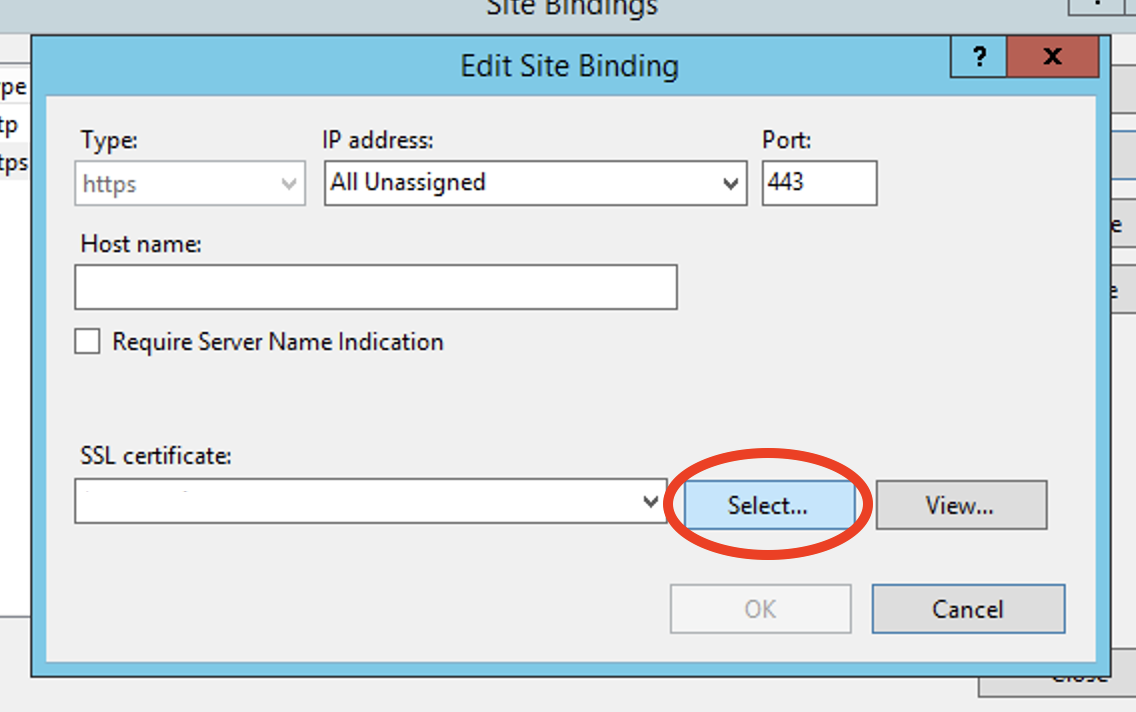
Step 7
Find the certificate by clicking **Select**. If you have multiple virtual hosts, enable the **Require Server Name Indication** option
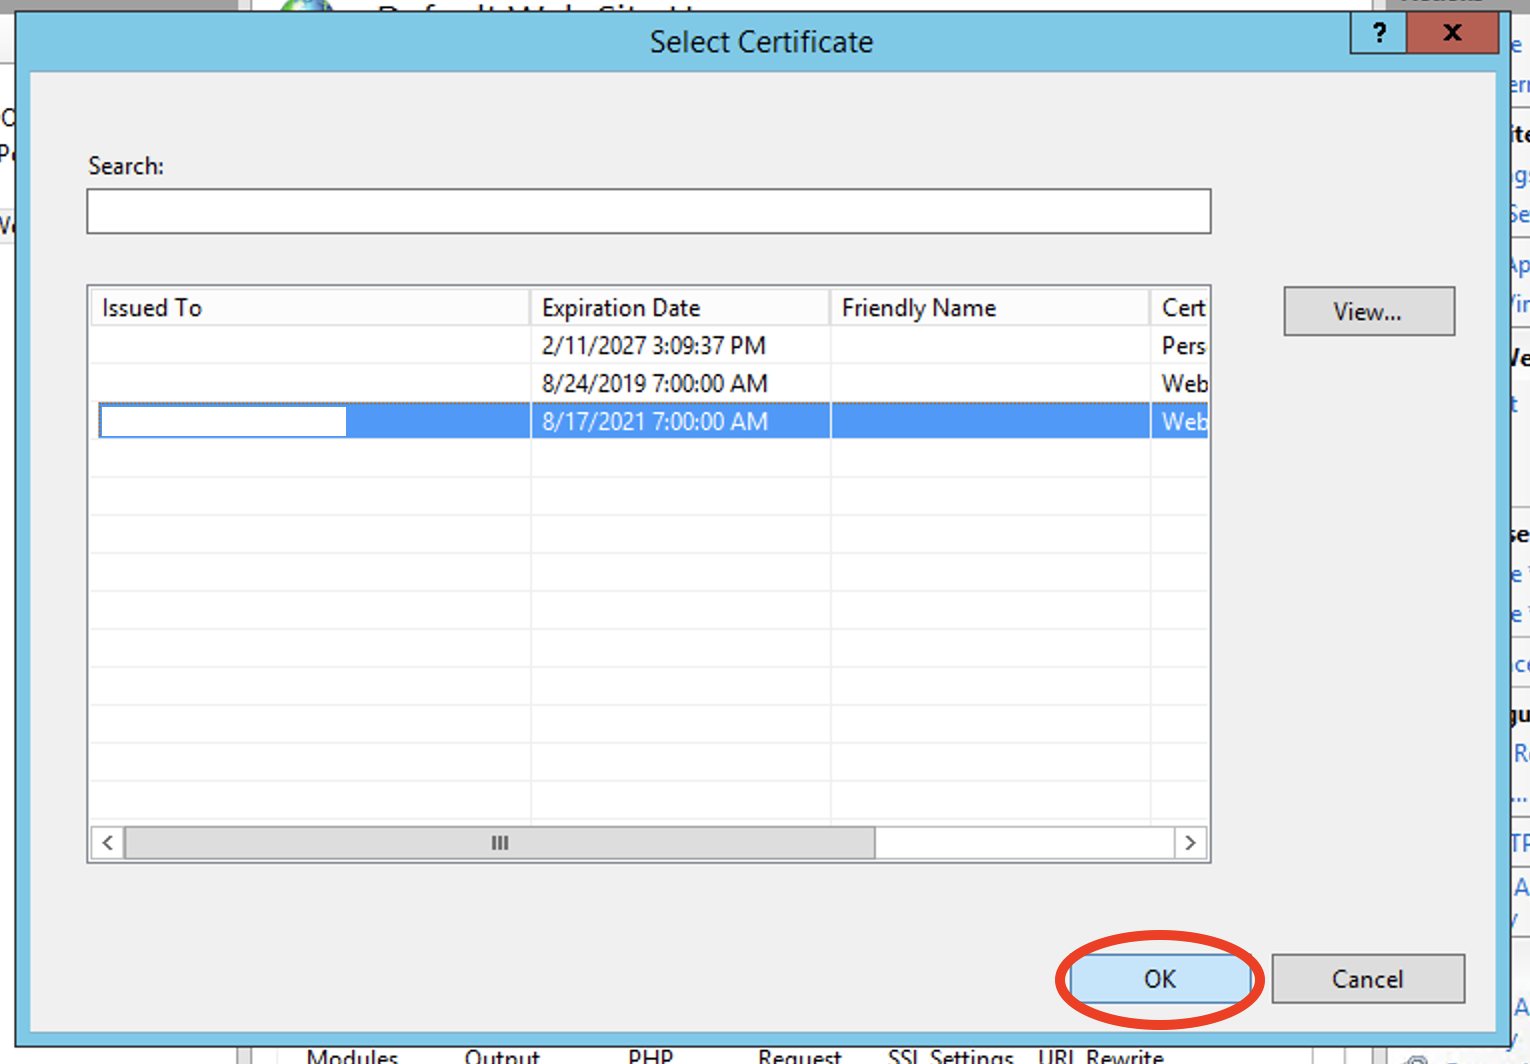
Step 8
Select the previously imported certificate and click **OK**
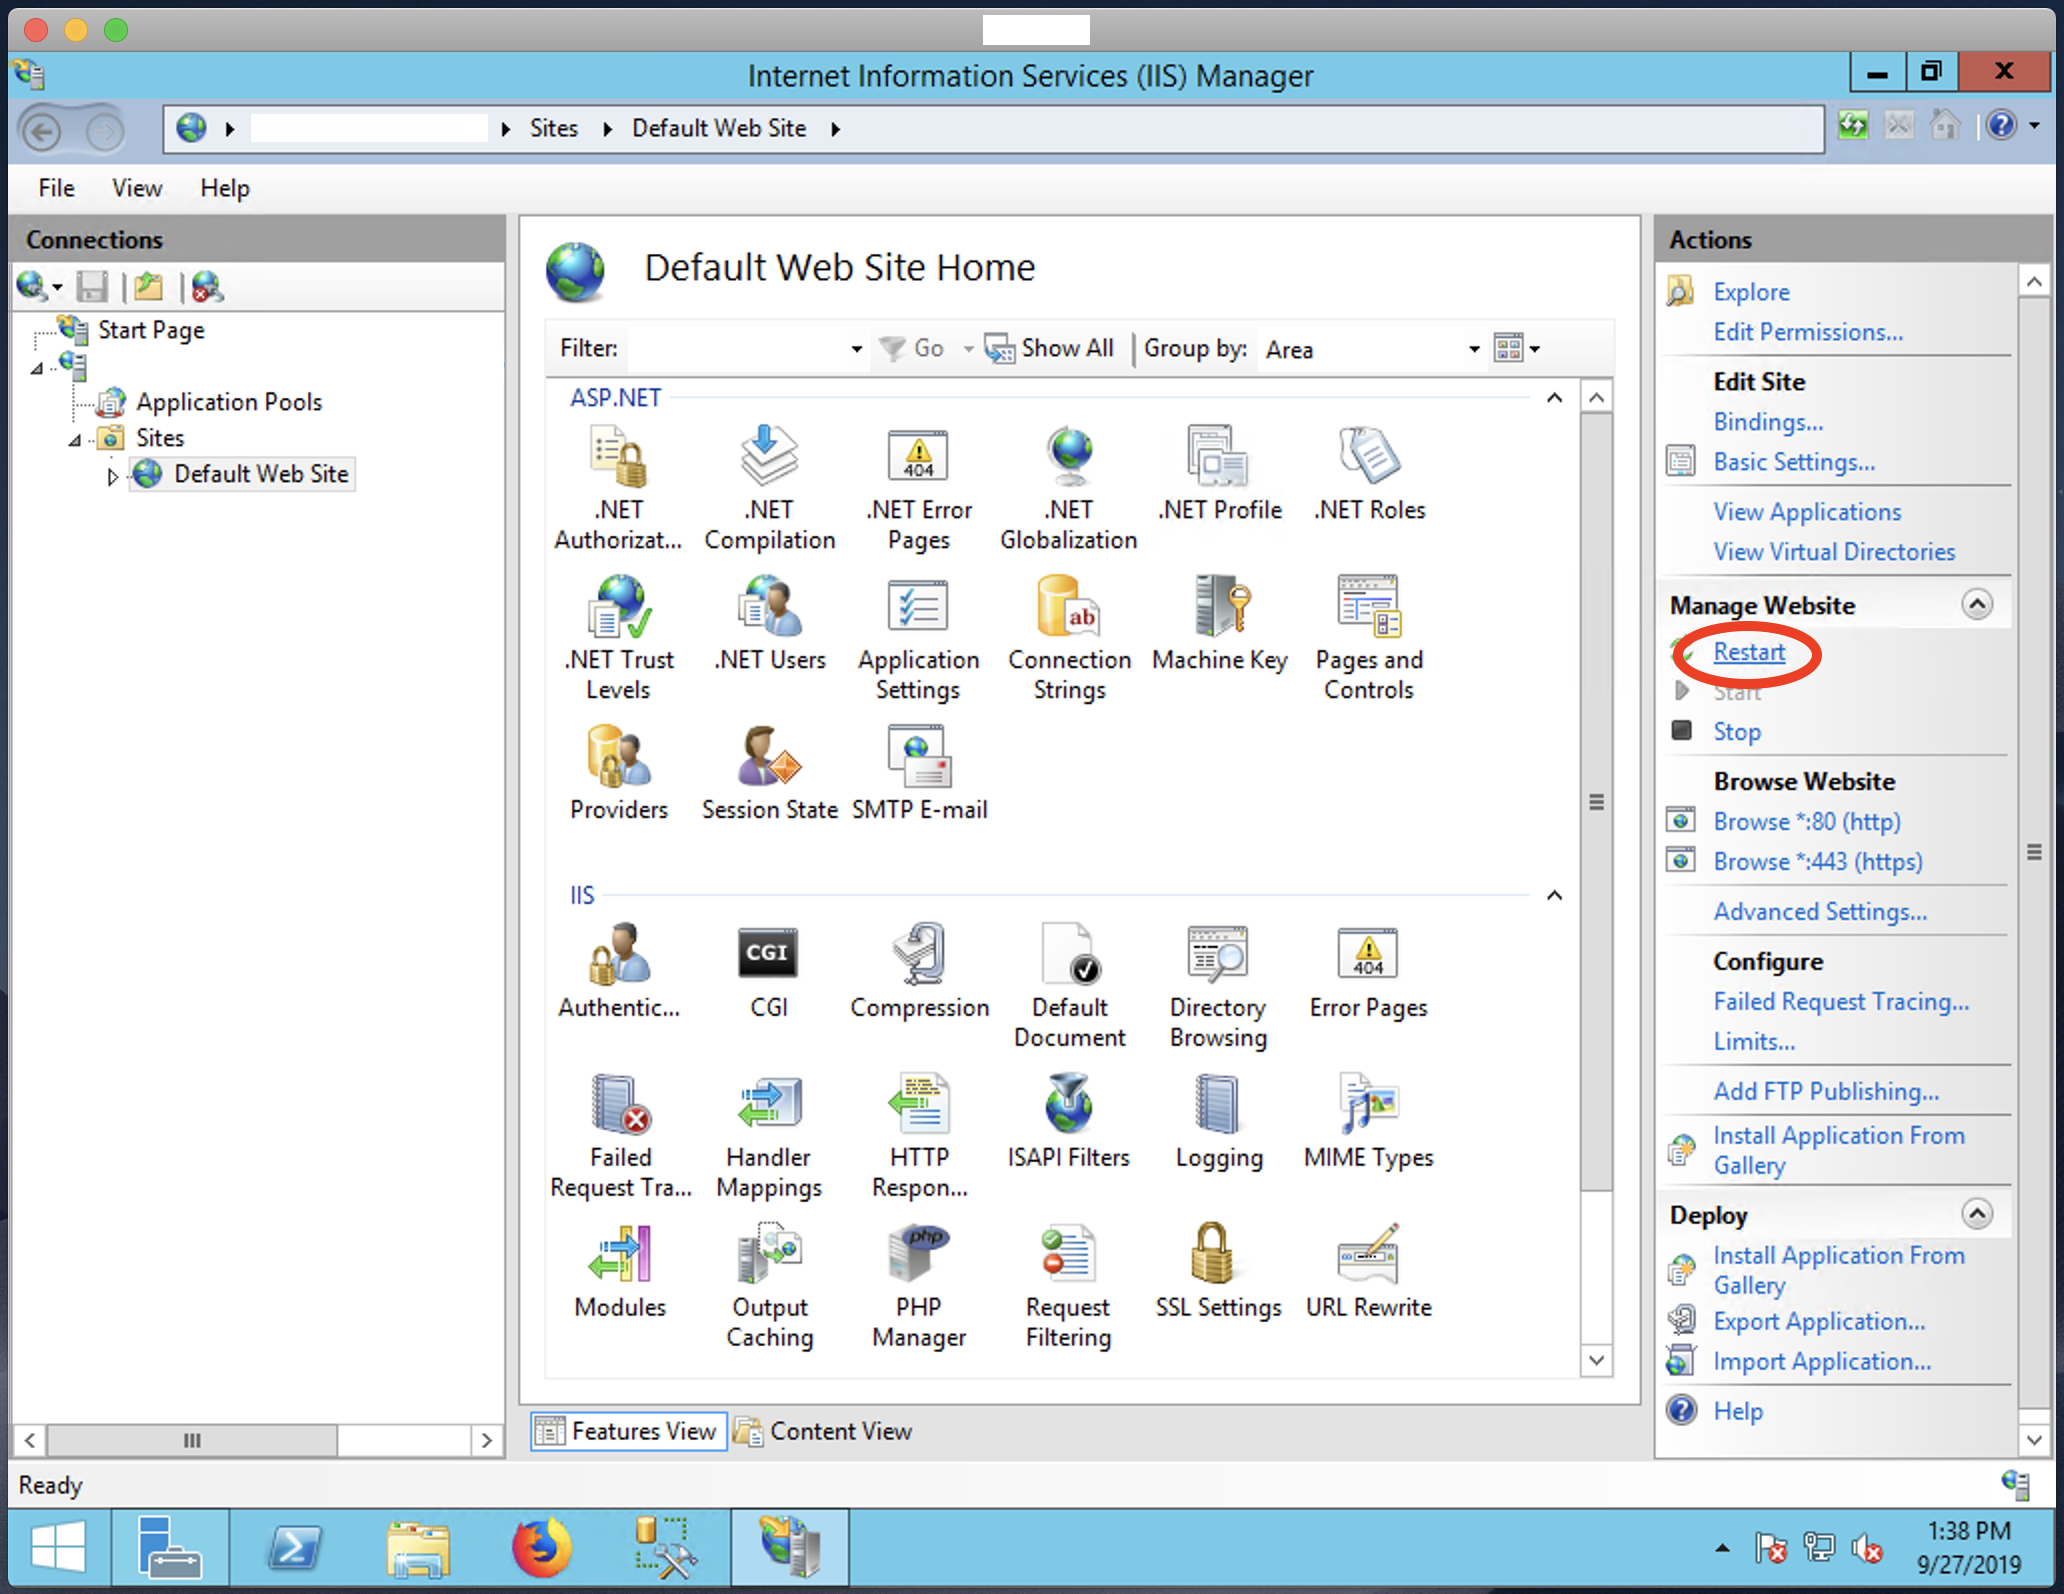
Step 9
Restart the site to start using the new SSL certificate. Click **Restart**